Let me walk you through how I learned to grow weed indoors. This is the same method I followed step-by-step, and I’ve made it as simple as possible so any beginner can do it too.
I created a cheat sheet to make this even easier, and it helped me through every stage, from seed to harvest. It takes about 3 to 5 months in total, and everything I’m about to share is based on actual experience and results from many growers.
Related: 10 Easiest Herbs to Grow Indoors
What You Need to Get Started
The most important thing to grow weed is light. Without enough of it, you won’t get good buds. I use LED grow lights, and I follow a simple rule, 30 watts per square foot of grow space. For three plants, a decent light costs about $150. If I spend money on anything, it’s the light.
Here’s are some basic gear I used:
| Item | Purpose |
|---|---|
| LED Grow Light | Main light source for plant growth |
| Timed Outlet or Surge Strip | Controls light schedule |
| Soil (Froggy Soil or Pro Mix HP) | Growing medium for the plants |
| 5-Gallon Fabric Pots | For proper root development |
| Nutrients (GH Flora Trio + Cal Mag) | Essential for feeding the plants |
| pH Up/Down + pH Meter | Adjusts water for proper nutrient absorption |
| Small Fan | Strengthens stems, reduces humidity and pests |
| Thermometer + Hygrometer | Monitors temperature and humidity |
Other optional items I later added included:
- Grow tent: Keeps environment controlled and reduces costs
- Reflective linings: Increases light efficiency
- Inline fan + carbon filter: Improves airflow and removes smell
Picking the Right Seeds

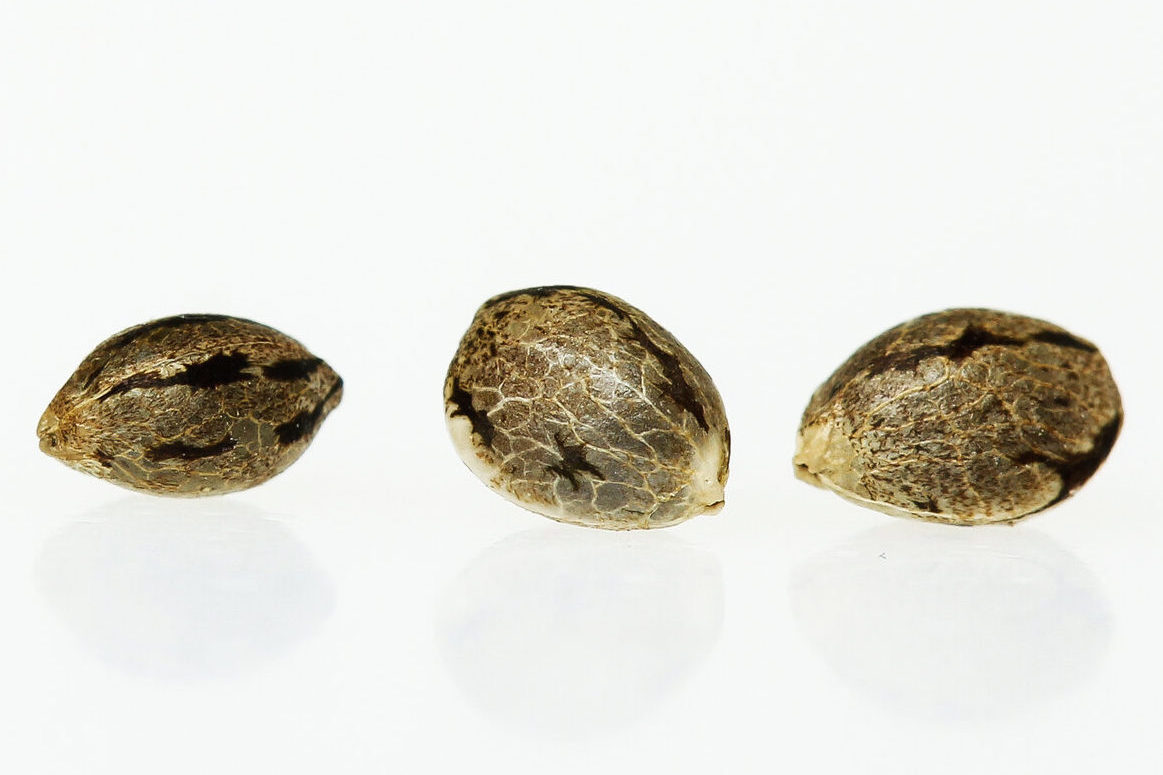
I learned there are three types of seeds:
- Regular seeds: 50/50 chance of male or female. I don’t want males unless I’m breeding.
- Feminized seeds: Always female. No guesswork.
- Autoflowers: These grow and flower automatically with 18 hours of light a day. However, once they flower, they stop growing, so they can be small. Also, I can’t clone them.
My recommendation as a beginner: feminized photo-period seeds. (Source)
Germinating the Seeds
To germinate, I found a warm place and used this method:
- Fill a mug halfway with room temp water.
- Add a few drops of hydrogen peroxide.
- Drop the seeds in (they’ll float).
- Cover the mug with foil.
- Wait for the seeds to sprout a taproot.
While I waited, I prepared my feeding water by:
- Filling a bucket with tap water.
- Adding 2–3 drops of hydrogen peroxide per gallon.
- Letting it sit at least 24 hours to let chlorine evaporate.
Once the taproot showed, I:
- Planted the seed root-down into moist soil.
- Covered it lightly.
- Placed a cut plastic bottle over the top to trap humidity.
- Kept the light 2 feet above, set to 18 hours per day.
Following the Cheat Sheet
I followed the cheat sheet which had tabs for both regular and auto flowers. The first column was the week number, and then it showed me the:
- Humidity levels
- Light intensity (measured using the Photone app)
- Lighting hours
- Nutrient dosages
I learned:
- Start with high humidity in week 1 and reduce gradually.
- Sync light schedule with natural sunlight to avoid leaks.
- Always mix nutrients in order and shake before using.
- Feed only when needed, younger plants need less water.
Feeding and Watering Tips
To avoid overwatering, I poked my finger two inches down. If it felt dry and had no soil stuck, it was time to water.
- A watered 5-gallon pot weighs around 15.5 pounds.
- I poured water in a circle one inch away from the stem.
- I poured slowly and returned to pour again after a few minutes.
By week 5, I started heavier feeding and flushed every third time. Flushing is giving only plain, pH-balanced water until a pint runs off from the bottom, not the sides.
Topping and Flipping
At the fifth node, I topped the plants to boost growth. Then I followed this rule:
- Vegetative stage (Week 6): Continue growing as long as needed.
- Flip to flowering: Change light to 12 hours/day.
Before flipping, I always defoliated the lower leaves and took clones if I wanted. After the flip, in about a week, I checked the plant’s sex:
- Balls = Male (remove immediately).
- White hairs = Female (keep growing).
If any pollen dropped, I sprayed the floor with water because water kills pollen.
When to Harvest
I knew the plants were ready when the trichomes looked milky or amber. I repeated week 10 of the chart until I was happy with how they looked. I made sure to:
- Flush every third feeding
- Follow the chart exactly
For autoflowers, I followed almost the same chart but kept the light at 18 hours for their whole life.
Final Thoughts
This guide helped me get a healthy harvest with solid buds. I didn’t have to keep watching new tutorials. Everything was there, all I needed was to follow it closely.
If you want to learn how I dry, trim, and cure the harvest, check out my other videos.
Frequently Asked Questions (FAQs) About Growing Weed at Home
1. How do I choose the right grow space?
I started by picking a space that could hold everything I needed. A small closet or a grow tent worked best for me. I made sure the walls were white or reflective to help with light. I also checked for ventilation and made sure the space could keep a stable temperature between 70 to 80°F. The area had to stay dark during the night cycle, so no light leaks were allowed.
2. What is the cannabis plant life cycle?
At first, I didn’t know this, but cannabis goes through several stages:
- Germination: When the seed sprouts.
- Seedling: Small plant with a few leaves.
- Vegetative: This is the growing phase.
- Flowering: Buds start forming.
- Harvest: Time to cut and dry the buds. Each phase has different needs for light, water, and nutrients. I followed the cheat sheet to stay on track.
3. What’s the difference between indoor and outdoor growing?
I chose indoor growing because I could control everything – light, air, and humidity. Outdoor growing depends on weather and seasons, and sometimes it’s not legal or safe. Indoors, I could grow all year round in a small space.
4. How do I manage pests and plant diseases?
I used a small fan to keep the air moving, which helped prevent mold and pests. I kept everything clean and avoided overwatering. If I ever noticed bugs or spots on leaves, I used natural sprays like neem oil and made sure humidity was in the right range.
5. What are training techniques like LST, HST, and SCROG?
I used LST (Low-Stress Training) by gently bending the branches to spread them out. This gave the plant more light. HST (High-Stress Training) is when you top or cut the plant to control shape. SCROG (Screen of Green) uses a screen to train the plant to grow wide. These methods helped me get more buds without growing taller plants.
6. How can I spot and fix nutrient deficiencies?
When my plant had yellow leaves or brown spots, it usually meant something was wrong. I checked the pH of my water to make sure the plant could absorb nutrients. I followed the feeding schedule closely. Adding Cal-Mag helped fix many issues like weak stems or pale leaves.
7. Why is air circulation and CO₂ important?
Plants breathe in carbon dioxide like we breathe in oxygen. I used an inline fan to bring in fresh air and remove old air. This helped my plants grow strong and avoided stale air or mold.
8. How do I build a budget grow setup?
I started simple:
- LED light: $150
- Fabric pots: Cheap and reusable
- Froggy soil or Pro Mix HP
- General Hydroponics Flora Trio + Cal Mag
- pH meter and some hydrogen peroxide I slowly added better equipment like a tent and carbon filter later.
9. Should I use organic or synthetic nutrients?
I started with synthetic nutrients like Flora Trio because it was easier to follow the schedule. Organic nutrients are great too but can take longer to break down. For beginners, synthetic was simpler.
10. How do I clone cannabis plants?
I took clones from regular plants right before flipping to flower. I cut a healthy branch, dipped it in rooting gel, and put it in moist soil under a dome. Not all clones survived, but it saved me from buying seeds again.
11. What are the best techniques for harvesting?
I waited until the trichomes turned milky or amber. Then I used scissors to cut the plant near the base. I removed large leaves first and trimmed the smaller ones before hanging the buds to dry.
12. How do I trim cannabis (wet vs dry)?
I tried both. Wet trimming means trimming right after harvest while the leaves are still soft. It was faster for me. Dry trimming is after drying the plant, and it gives cleaner results but takes longer.
13. How do I dry and cure cannabis properly?
I hung the trimmed buds in a dark room with about 50% humidity and 70°F temperature. After 7-10 days, when the small stems snapped, I moved the buds to jars. I opened the jars daily for 10-15 minutes (called “burping”) for 2 weeks.
14. How do I store cannabis after harvest?
I kept the cured buds in airtight glass jars in a cool, dark place. This kept the buds fresh and potent for months.
15. What are the most common mistakes beginners make?
Here are some mistakes I made and learned from:
- Overwatering
- Not adjusting pH
- Using poor lighting
- Harvesting too early
- Ignoring male plants Being patient and consistent helped me the most.
16. What legal issues should I consider before growing?
I always checked the laws in my area first. Some places allow growing at home, others don’t. It’s important to stay safe and legal before starting.
17. How do I read seed packaging?
The seed pack showed if it was feminized, autoflower, or regular. It also showed THC/CBD levels, flowering time, and if it was Indica, Sativa, or hybrid. I picked ones that matched my grow space and skill level.
18. How can I improve my yield?
I got better yields when I:
- Trained my plants (LST or topping)
- Used better lighting
- Fed properly
- Controlled humidity
- Gave them enough space and time More light and bigger pots really made a difference.
19. What are the best strains for beginners?
For me, feminized photo-period strains were easiest. Some forgiving beginner-friendly strains I liked were Northern Lights, Blue Dream, and AK-47.
20. Why isn’t my plant growing?
When my plant stopped growing, I checked these:
- Light wasn’t strong enough
- Water pH was wrong
- Not enough nutrients
- Overwatering
- Roots were bound in a small pot Fixing these usually got things back on track. Sometimes I just needed to wait and let the plant recover.
These FAQs are based on what I actually went through as a beginner. If I can do it, you can too, as long as you follow the basics and stay consistent.


