Carpenter bees are interesting creatures. I’ve always found them fascinating, and I understand how important they are to our environment. But when they start damaging your property, you’ve got to do something.
Let me walk you through exactly how I dealt with a carpenter bee infestation step-by-step.
Step 1: Identifying Carpenter Bees
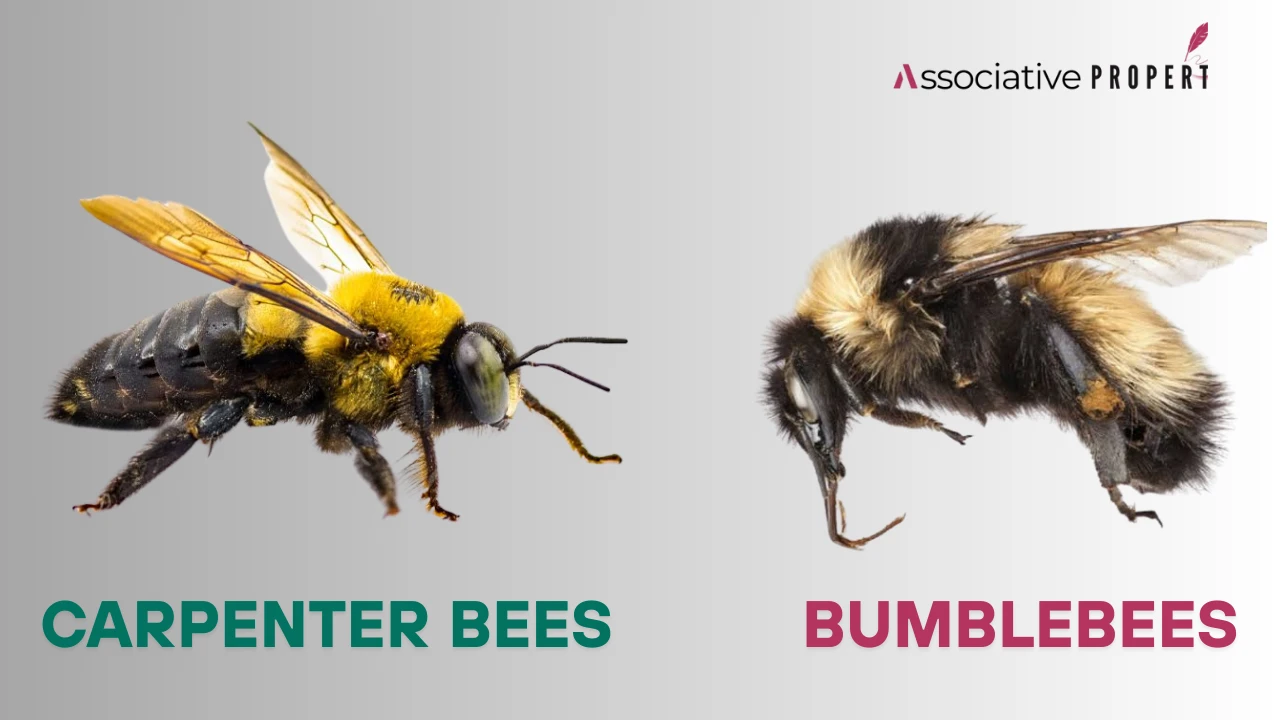
Before doing anything, I needed to be sure I was dealing with carpenter bees and not something else. They often look like bumblebees, so here’s how I told them apart:
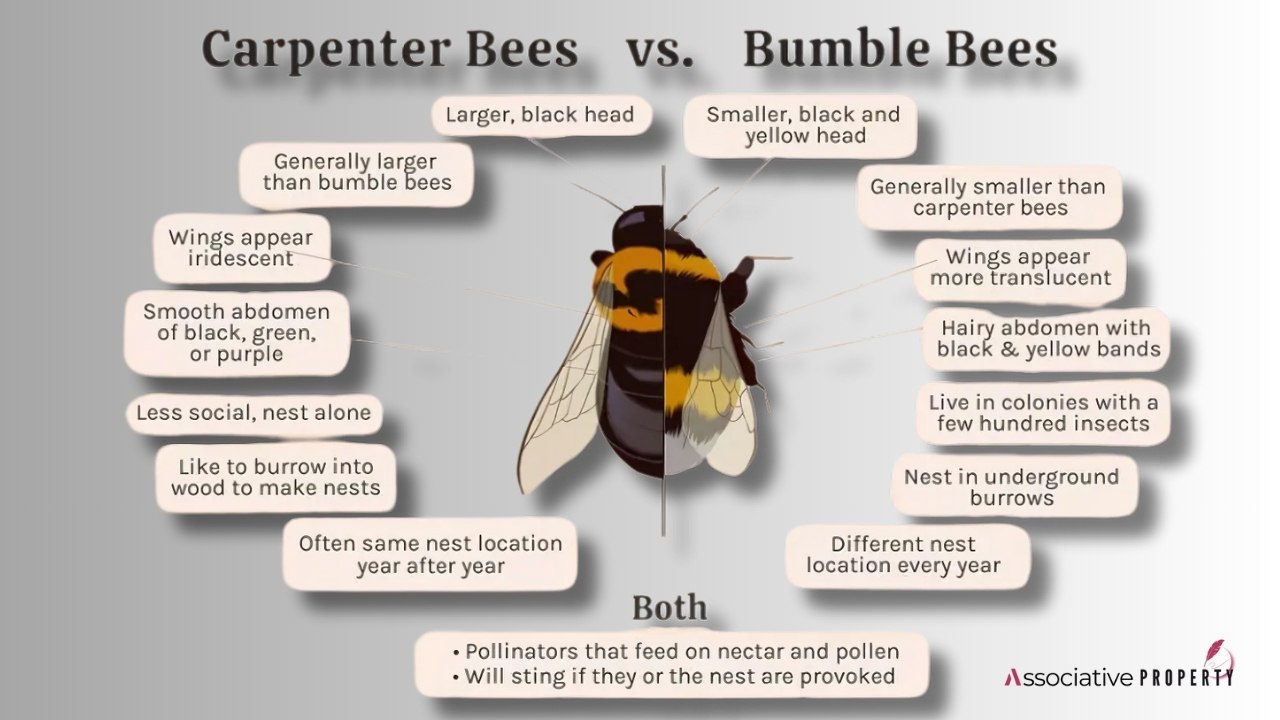
Comparison Table: Carpenter Bees vs. Bumblebees
| Feature | Carpenter Bees | Bumblebees |
|---|---|---|
| Size | 3/4 to 1 inch | Around 3/4 inch |
| Color | Yellow and black | Yellow and black |
| Abdomen | Hairless and shiny black | Hairy |
| Nesting behavior | Drill into soft wood (like cedar/pine) | Nest in the ground |
When I looked at the pergola in my backyard, which is made of cedar, I noticed some small holes. Looking closely under the beams, I saw exactly where the carpenter bees had drilled into the wood.
I also spotted coarse sawdust, called frass, directly below the holes. This frass falls when they dig tunnels, so you might see it on outdoor furniture or the ground underneath the wooden area.
Inside the wood, the female bee creates small chambers. She places a ball of pollen in each, and then lays an egg. When the egg hatches, the larva feeds on the pollen before eventually leaving the hole as an adult bee.
Step 2: Treating the Tunnels
After identifying the problem, I moved to treatment. I noticed two types of holes:
- Older tunnels: Dark inside, with worn-out edges.
- New tunnels: Lighter wood color, sharp and clean edges.
Even though the old holes didn’t seem active, carpenter bees often reuse them. So I treated both.
Before starting, I put on my personal protective equipment (PPE). This included:
- Gloves
- Eye protection
- A mask
Then I used a product called FitPro aerosol. It contains fipronil and comes out as foam. This foam expands thirty times its size, which fills up the tunnels completely.
Here’s what I did:
- Inserted the foam into each hole for about 3–4 seconds
- Moved all around the pergola to make sure every hole was treated
- Once I finished, I used wood putty to seal up the holes and stop the bees from coming back
Step 3: Preventing Future Infestation
After the treatment and sealing, it was time to think about prevention. I used a liquid product called Dominion 2L, which I had already mixed in a sprayer.
Here’s how I applied it:
- Started from one corner of the pergola
- Worked my way around, spraying all wooden surfaces
- Sprayed just enough to wet the wood, not soak it
This created a residual barrier that could last weeks to months, depending on weather and conditions.
When Is the Best Time to Treat Carpenter Bees?
It’s important to know when carpenter bees are most active. Here’s what I learned:
- Adults overwinter inside their tunnels
- They emerge in early spring
So, the best time to treat is:
- Late winter
- Early spring
For prevention, I recommend spraying 2–3 times during spring and early summer.
Final Thoughts
That’s how I handled the carpenter bee issue on my property. It took some effort, but by following a clear process, I was able to stop the damage and prevent it from happening again.
If you’re dealing with carpenter bees, I hope this step-by-step guide helps you just like it helped me.
Related: How To Get Rid of Japanese Beetles in 4 Easy Steps
| Category | Detail |
|---|---|
| Average Size | 0.75 to 1 inch long |
| Wood Preference | Softwoods like Cedar, Pine, Redwood, and Douglas Fir |
| Entry Hole Diameter | About ½ inch wide |
| Tunnel Depth | Typically 6–10 inches, can reach up to 1 foot |
| Eggs per Tunnel | Around 6 to 10 eggs, each laid in separate chambers |
| Development Cycle | Around 5–7 weeks from egg to adult |
| Overwintering Behavior | Adult bees stay inside tunnels during winter, emerge in early spring |
| Reinfestation Risk | Up to 90% of untreated holes are reused in future seasons |
| Frass (Wood Dust) Appearance | Coarse, yellowish dust found directly under holes |
| Damage Potential | Long-term infestations can cause serious structural damage |
| Annual U.S. Property Damage | Estimated at $100 million from carpenter bees and wood-boring insects |
| Foam Insecticide Expansion | Like FitPro, expands at a 30:1 ratio inside tunnels |
| Residual Insecticide Life | Sprays like Dominion 2L last 4 to 8 weeks, depending on weather |
| Best Treatment Time | Late winter to early spring, before new activity begins |
| Preventive Spray Frequency | Recommended 2–3 times during spring and early summer |
FAQs Related How to Remove Carpenter Bees From Garden?
Q1: Do carpenter bees eat wood?
No, carpenter bees don’t eat wood. They chew into it to create tunnels for laying eggs. The wood is used as shelter, not as food.
Q2: Can carpenter bees sting?
Male carpenter bees cannot sting at all. Females can sting but usually won’t unless directly threatened or handled.
Q3: Will carpenter bees damage my house?
Yes, they can cause damage over time by tunneling into soft wood like fascia boards, decks, and trim. Multiple generations may reuse the same tunnels year after year, worsening the issue.
Q4: Are carpenter bees beneficial?
Yes, they are valuable pollinators for many plants. If they aren’t causing structural damage, it’s often best to leave them alone.
Q5: What attracts carpenter bees to wood?
They are drawn to soft, untreated, and unpainted woods like cedar, pine, or redwood—especially in sunny areas. Smooth surfaces are easier for them to tunnel into.
Q6: How can I prevent them from coming back every year?
After treating the tunnels, seal them with wood filler or caulk and repaint or stain the surface. Painted wood deters them. A preventive spray in early spring also helps keep them away.
Q7: Is there a natural way to repel carpenter bees?
Yes. Citrus oil, almond oil, and vinegar sprays can help repel them naturally. These are best used as deterrents rather than complete solutions
Related: How I Removed Colorado Potato Beetles Using This Simple 3-Step Process