I’ve always loved avocados, but one day I thought, why not try growing one myself? It turns out, it’s a fun little project, and if you’re patient, it really works. Here’s exactly how I did it.
Related: How To Plant a Tomato: My Simple Method
Picking the Right Avocado
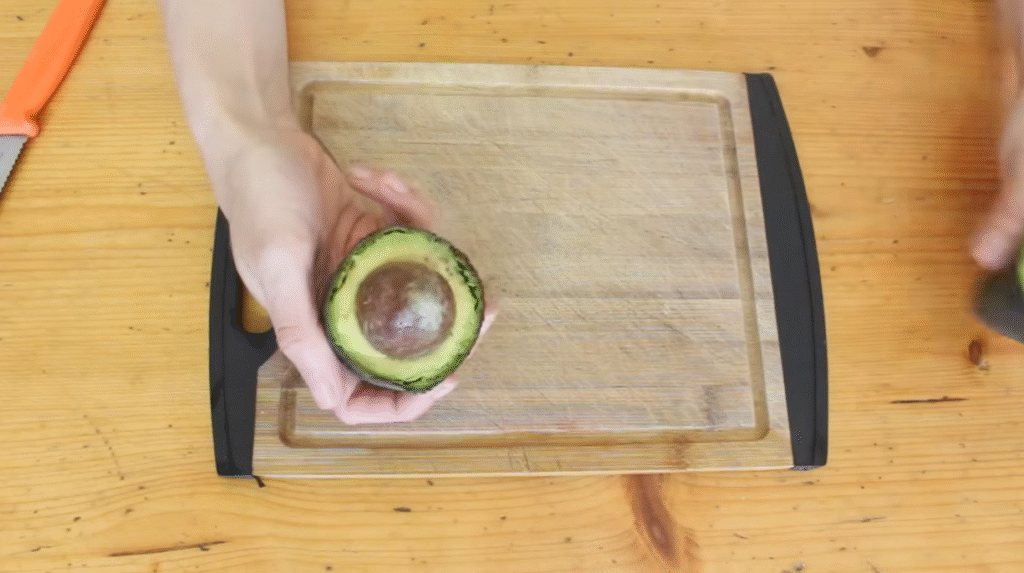
I grabbed a ripe avocado. The bigger ones tend to do better, though smaller ones can work too. I sliced it around the middle, not lengthwise, because the seed inside is precious. I didn’t want to damage the bottom of it, that’s where the roots come from.
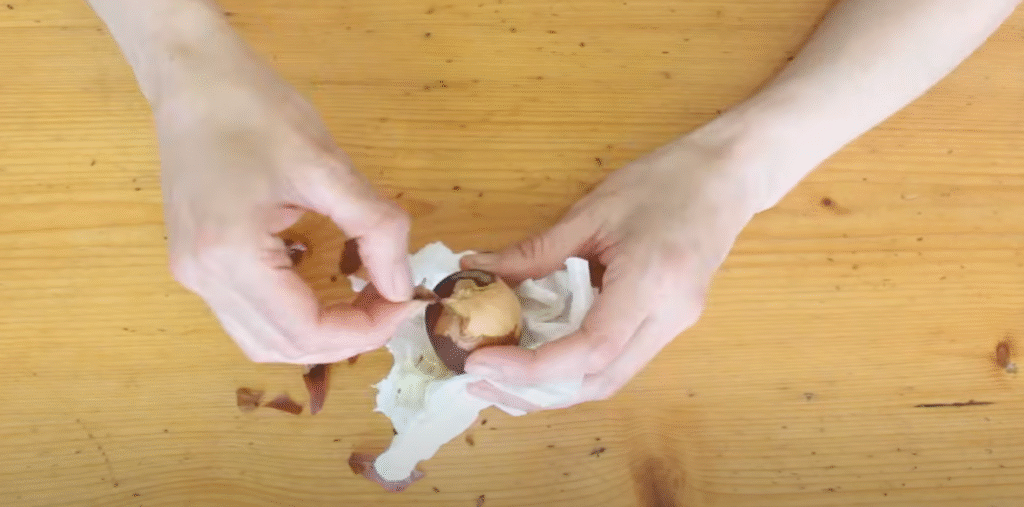
Once I had the seed out, I wiped it clean using a kitchen towel. The seed was quite slimy, and I decided to peel off the brown outer skin. It’s not necessary, but I find it helps when sprouting in water. It’s a bit like peeling off dried nail polish, oddly satisfying.
Some seeds are easier to peel than others. If it doesn’t all come off, that’s fine. The veiny underlayer might stay, and that’s okay. It either comes off later on its own or just stays forever. Either way, it doesn’t stop the sprouting process.
Understanding the Seed’s Orientation
The seed has a pointy end (top) and a fat end (bottom). The bottom has a little circle or dimple, that’s where the roots will grow. So the bottom needs to go in water, while the top points upward.

Sprouting the Seed in Water
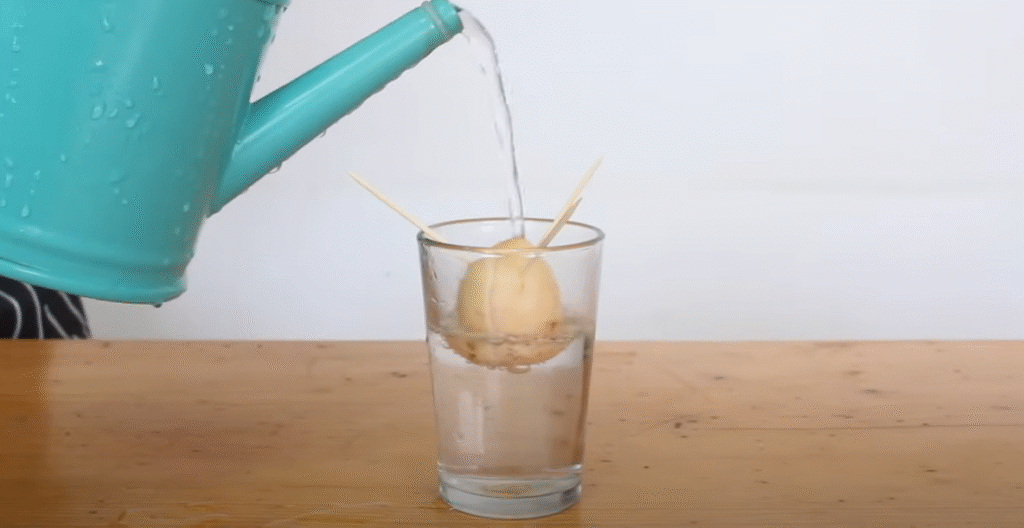
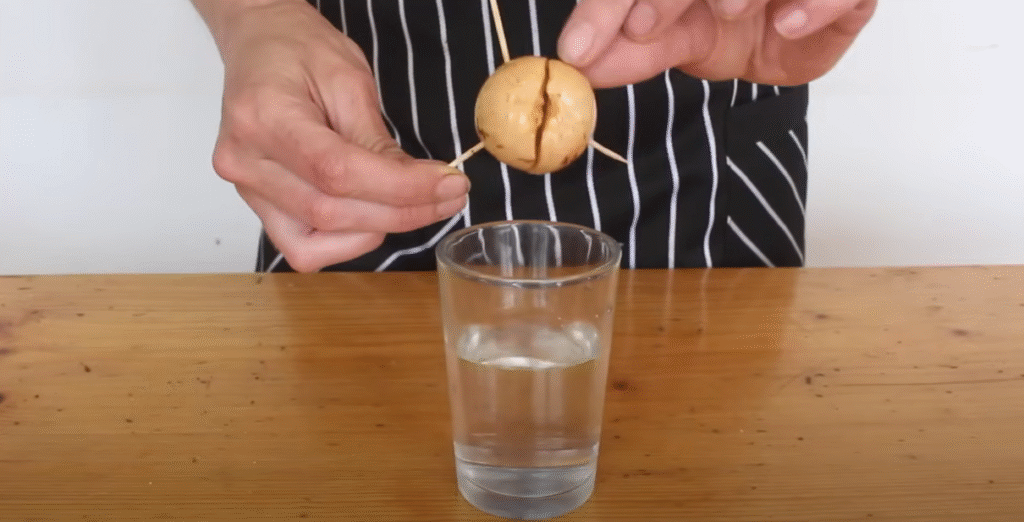
I grabbed a few toothpicks and stuck them into the sides of the seed, about one-third down from the top. I avoided the crackly vein-like lines when poking them in. You don’t have to go deep, just enough so the picks stay put.
I angled them slightly, which helped balance the seed on a glass of water. I filled the glass so the water reached about halfway up the seed. Then I placed it somewhere that gets bright but indirect light.
Water Care Tips
- Change the water every few days to keep it fresh and oxygen-rich.
- Don’t just top it up. Dirty water becomes smelly and buggy.
- Try sprouting a few seeds at once, some just won’t sprout.
I gave each seed around two months. If there was no sign of life by then, I tossed them out.
First Signs of Life
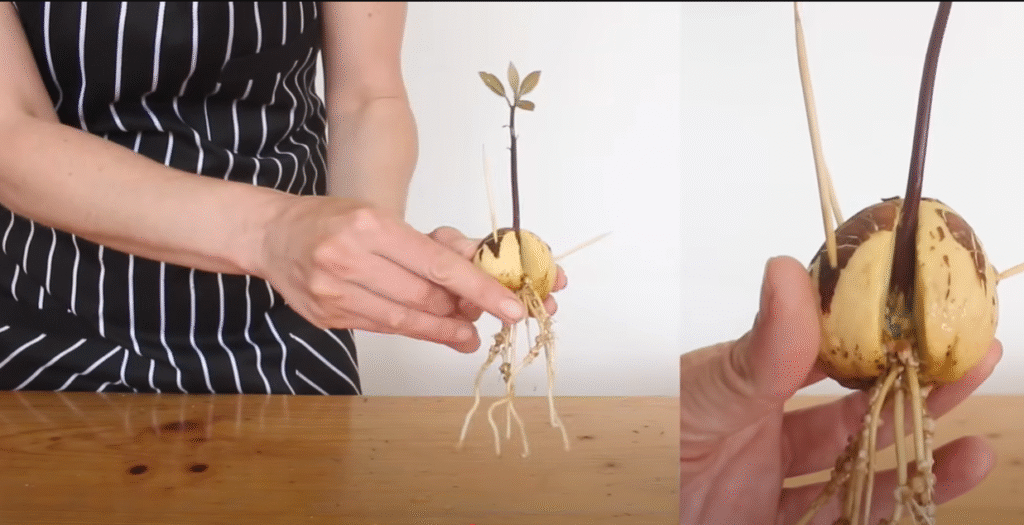
The first thing I looked for was a crack in the seed. That’s a great sign. Soon, a little white taproot started poking out. That’s when I usually moved them to soil because the taproot is delicate and easy to damage.
If you leave the seed in water too long, the root keeps growing downwards and may start to bend due to space. Eventually, you’ll spot a tiny stem forming from the top, near the root area.
Sometimes, even when the root grows, the stem takes a while. But if there’s a good crack, you might see the stem starting to peek through.
Potting the Avocado Seed
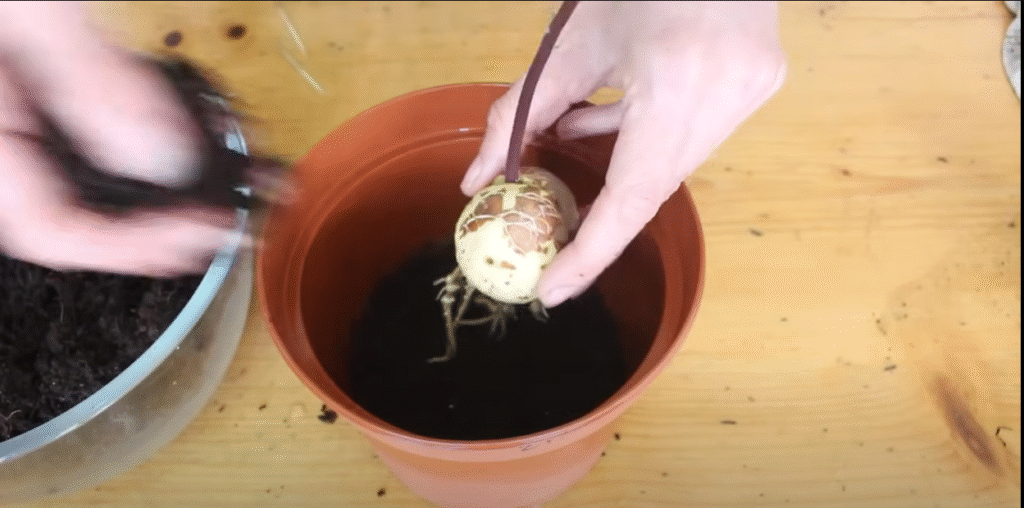
Once I had roots, I grabbed a six-inch plastic pot and filled it with regular potting soil. Avocados don’t like being too wet or too dry, so regular soil works well.
I left about an inch of space at the top to make future watering easier. Then, I made a little dent in the soil and placed the seed halfway in. It’s important not to bury it completely.
Don’t forget to remove the toothpicks before planting.
I didn’t push the seed down. I just gently nestled it in, added a bit more soil around it, and gave it a good watering.
What if the Root Is Bigger?
If your seed has a longer root, here’s what I did:
- Dug a deeper hole or trench in the pot
- Carefully lowered the root in using a spoon or chopstick
- If the root caught on anything, I took it out and made the hole bigger
- Watered it again to settle the soil around the root and seed
For really big root systems, I held the seed in place and gently filled dry soil around the roots. Then I watered the pot thoroughly. As the soil settled, I added more and repeated this until the seed was halfway covered. Dry soil is light, so it didn’t damage the roots, and water helped the soil fall into place gently.
Helping It Grow Into a Small Tree
Avocado plants can grow very tall. But I wanted a small, bushy plant. So, when the top leaves formed, I pinched off the growing tip, the tiny pointy bit where new leaves were forming.
This helped the plant branch out rather than grow tall. It encouraged it to grow new branches instead of stretching upwards.
Watering Routine
I let the top layer of soil dry out between waterings. When I did water it, I made sure it drained well from the bottom holes. That helped flush out minerals, since avocados don’t like mineral build-up.
Light and Outdoor Transition
I kept the plant in the same kind of bright indirect light it had when sprouting. Once it got a bit bigger and had a few leaves, I started to harden it off. That meant slowly introducing it to outdoor conditions so it could enjoy the summer sun.

Quick Reference Table For You
| Step | What to Do |
|---|---|
| Seed Prep | Cut avocado around middle, remove and clean seed, peel outer layer (optional) |
| Orientation | Pointy end up, fat end down (bottom has the root dimple) |
| Toothpicks | Insert 3–4 around top third to suspend in water |
| Watering | Change every few days with fresh water |
| Signs of Life | Seed cracks, taproot appears, stem follows |
| Potting | Use regular soil, bury halfway, don’t damage root |
| Maintenance | Water deeply, pinch growing tip, give bright indirect light |
Growing an avocado from seed is slow, but it’s truly rewarding. Every little root and sprout feels like a victory. If you’re thinking of trying it, give it a go, you might just end up with a beautiful plant of your own.